Looking to master heat transfer logo placement on sweatpants? You’re in the right place! Whether you’re customizing athletic wear or creating fashion joggers, perfect heat transfer logo placement on sweatpants can make or break your design. In this comprehensive guide, we’ll show you professional techniques for optimal heat transfer logo placement on sweatpants, covering everything from measurement methods to common mistakes. These proven tips will help you achieve flawless results every time.
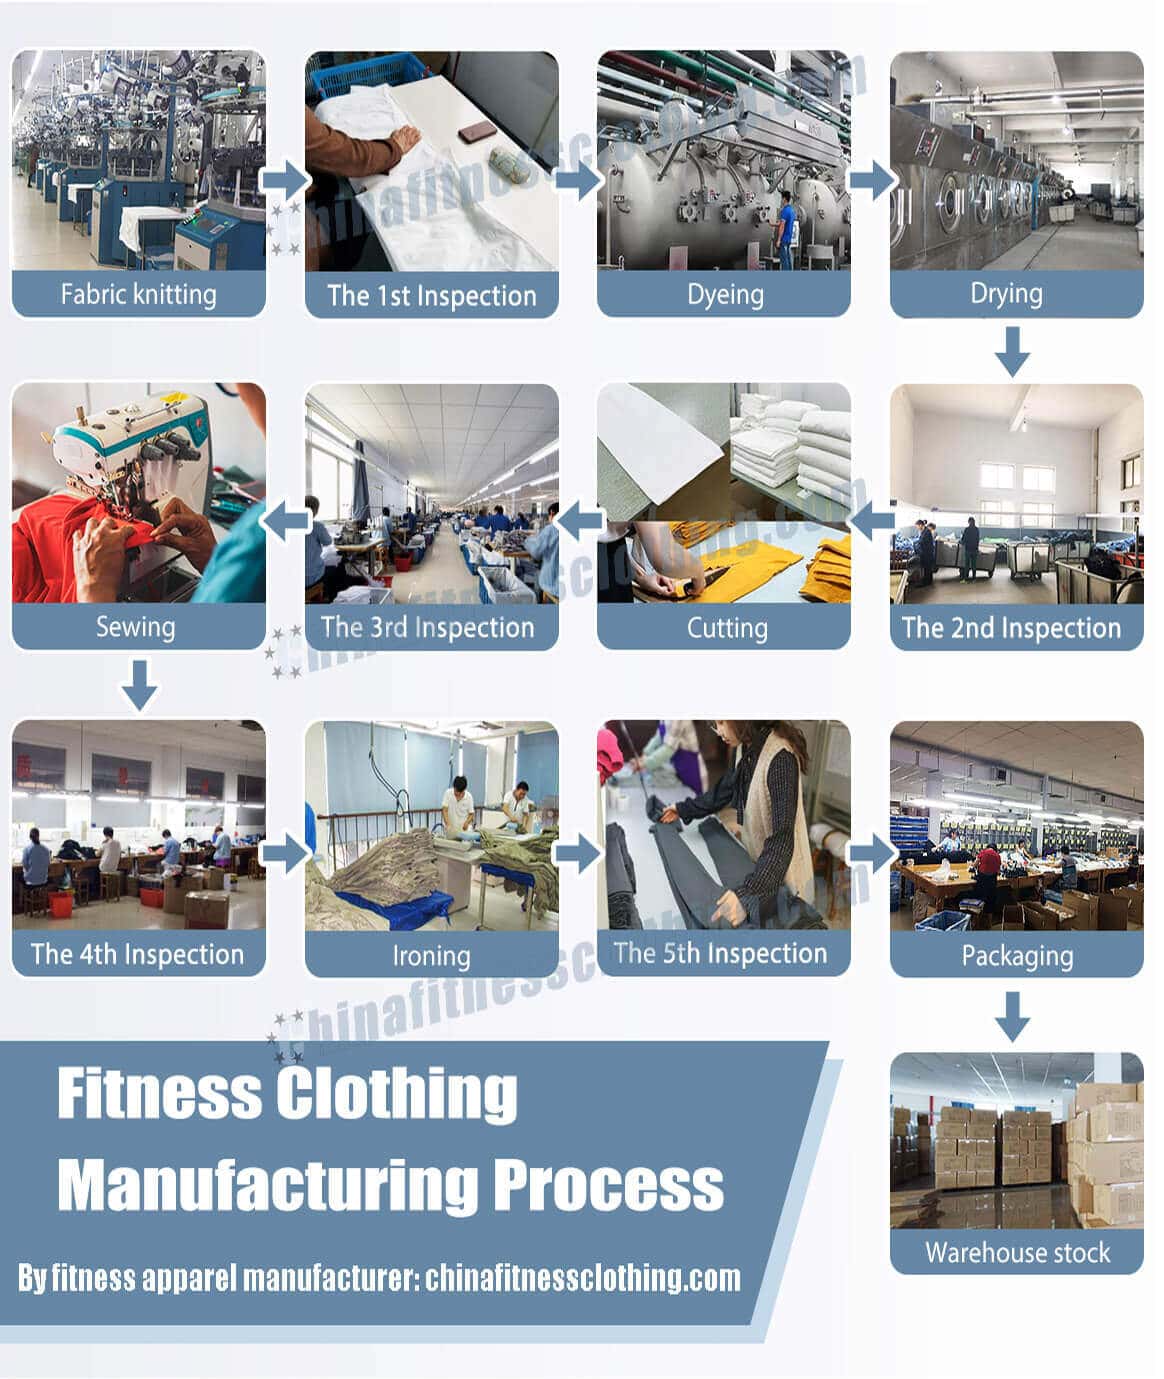
What is heat transfer printing?
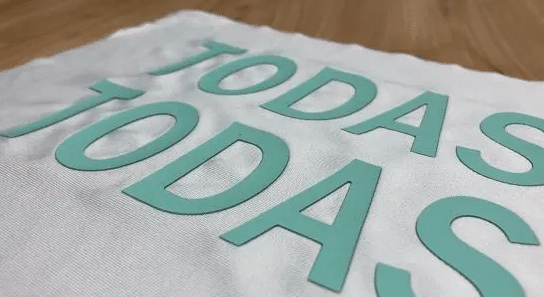
Heat transfer printing is a decorative technique that transfers patterns, text, or logos onto the surface of textiles. This method is commonly used to decorate garments by applying custom designs, logos, or artwork, allowing for personalized and visually appealing clothing items. By using specialized heat transfer printing machines and hot stamping films, patterns or text are transferred from the film to the surface of the fabric, and then fixed on the fabric through heating and pressure, achieving the effect of beautifying the product and enhancing the brand image.
Why Logo Placement Matters
1. Enhance Brand Visibility
The logo acts as a visual representation of your brand. Placing it in “prime locations” like the side thigh or waistband makes it more noticeable, increasing brand exposure and recognition. The most popular side for vertical logo placement on sweatpants is the left leg, as this maximizes visibility.
- Draw Attention: A logo on the outer thigh moves with the wearer, making it more visible.
- Build Consumer Connection: A well-placed logo helps consumers associate with your brand, boosting loyalty and repeat purchases.
2. Improve Design Aesthetics
Logo placement must align with the overall design of sweatpants to maintain visual appeal. Poor placement can disrupt the balance and make the product look unpolished.
- Balance and Symmetry: Aligning the logo with the waistband or cuffs creates a cohesive design. Placing the logo in the front middle or along the side seam is considered a classic placement for sweatpants, offering a timeless and balanced look.
- Size and Proportion: A logo that’s too large can look overwhelming, while a small one may go unnoticed.
3. Add Professionalism and Functionality
Logo placement should enhance both the look and usability of the sweatpants.Poorly placed logos can impact comfort and durability.
- Avoid Movement Zones: Placing logos on areas like the back of the knees can lead to distortion or fading.
- Showcase Attention to Detail: Logos on side pockets or front thighs convey professionalism and thoughtful design. Even a bit of adjustment in logo placement or size can make a significant difference in the garment’s professional appearance.
4. Communicate Brand Values
Logo placement reflects your brand’s identity and values.
- Activewear Brands: Logos on prominent areas like the thigh highlight energy and movement.
- Luxury Brands: Small, subtle logos on waistbands or pockets emphasize sophistication and exclusivity.
A combination of logo placements, such as pairing a thigh logo with a subtle cuff logo, can reinforce brand values and create a unique look.
5. Influence Purchase Decisions
Logo placement can directly affect consumer buying behavior. Poor positioning may lead buyers to choose competitors.
- Fashion Preferences: Trendy consumers prefer logos in visible areas like the side or front. Bold logo placements or vibrant designs can make the artwork pop, drawing more attention from potential buyers.
- Practical Needs: Activewear buyers prioritize durable logos that won’t fade or peel.
6. Align with Trends and Market Demands
Trends evolve, and logo placement must adapt to meet consumer expectations.
- Minimalist Designs: Subtle logos on cuffs or waistbands are popular for modern, sleek styles. Generally, minimalist logo placements are preferred for modern styles.
- Bold Statements: Younger consumers favor large, eye-catching logos on the thigh for a personalized touch. Generally, larger placements are favored for bold statements.
Guide on heat transfer logo placement on sweatpants
When designing sports pants, the placement of the logo is an important consideration factor, which not only affects the aesthetics of the product, but also involves functionality and brand image. This guide will cover different placements for logos and artwork on sweatpants to achieve both functional and aesthetic goals. The following is a detailed explanation of the principles for placing the logo of sweatpants:
Measuring and Sizing for Perfect Placement
Getting the right measurements and sizing is key to achieving ideal placement for logos on sweatpants and other garments. Start by considering the print area available on the garment and the overall style you want to achieve. For example, when placing logos on the left leg of sweatpants, the most popular placement is typically 5-7 inches down from the waistband and about 3 inches from the left seam. The size of the logo should be balanced with the garment’s proportions—ankle prints usually look best with a maximum width of 3-4 inches, while full leg prints can range from 8-13 inches wide. Taking the time to measure and size your logo correctly ensures that your design is both visually appealing and professionally executed, helping your brand or creative vision stand out.
Troubleshooting Common Issues
Even with careful planning, issues can arise during the heat transfer printing process. Misaligned logos, uneven prints, or fabric damage are common challenges. To avoid these problems, always check the print area for any obstructions like seams or pockets that could interfere with the transfer. Make sure the garment is properly aligned on the press, and double-check that the fabric is smooth and free of wrinkles. Using the correct temperature and timing settings for your transfer material is crucial to prevent scorching or incomplete prints. Regular maintenance of your heat press and choosing high-quality transfer paper will also help ensure that your logos come out crisp and professional every time. By paying attention to these details, you can minimize errors and achieve consistent, high-quality results on every garment.
Best Tools for Heat Transfer Printing
Investing in the right equipment can make the difference between amateur-looking logos and professional-grade results. Here’s what you need for perfect heat transfer logo placement on sweatpants.
Essential Heat Transfer Equipment
Heat Press Machines
A quality heat press is your most important tool. For sweatpants logo placement, consider these options:
- Clamshell Heat Press (15×15 inches): Ideal for beginners and small businesses. The Cricut EasyPress 2 or PowerPress are great entry-level options that handle most sweatpants sizes. Price range: 200−500.
- Swing-Away Heat Press (16×20 inches): Offers better pressure distribution and easier access to position your logo. The Fancierstudio Power Heat Press provides professional results with precise temperature control. Price range: 300−800.
- Heat Press with Lower Platen: For curved surfaces like the side seam of sweatpants, a heat press with an adjustable or smaller lower platen prevents impressions from seams showing through. Price range: 400−1,200.
Pro Tip: Choose a heat press with digital temperature and timer controls. Consistency is crucial—analog machines can vary by 10-20°F, which affects transfer quality.
Transfer Paper and Materials
The type of transfer paper you use depends on your sweatpants fabric:
- For Light-Colored Cotton/Cotton Blends: Inkjet transfer paper (like Avery T-Shirt Transfers) works well for home projects. For professional results, use sublimation paper with polyester-coated materials.
- For Dark-Colored Sweatpants: Opaque heat transfer vinyl (HTV) like Siser EasyWeed or Cricut Everyday Iron-On provides vibrant colors that pop against dark fabrics.
- For Performance/Athletic Fabrics: Low-temperature transfer papers (applied at 270-290°F) prevent fabric damage on moisture-wicking sweatpants.
Cutting Tools
- Vinyl Cutter/Plotter: A Cricut Maker or Silhouette Cameo 4 allows you to cut precise logos from HTV. Essential for intricate designs and consistent placement.
- Weeding Tools: Fine-tip tweezers and weeding hooks help remove excess vinyl without damaging your logo design.
Positioning and Measuring Tools
Precision placement is everything:
- Heat-Resistant Ruler: Measure exact distances from waistband or hem for consistent logo placement across multiple sweatpants.
- Alignment Guides: Create cardboard or acrylic templates for your most common logo positions (left thigh, right ankle, etc.). This ensures every pair has identical placement.
- Tailor’s Chalk or Fabric Marker: Mark your placement position before pressing. The heat will erase most fabric markers.
- Teflon Sheets: Protect your logo during pressing and prevent scorching. Essential for heat-sensitive fabrics.
Quality Testing Equipment
- Infrared Thermometer: Verify your heat press temperature is accurate. Even calibrated machines can drift over time.
- Stretch Test Fabric Samples: Test your logo placement and adhesion on scrap fabric before committing to finished sweatpants.
Recommended Setup by Budget
Starter Setup (300−500)
- Cricut EasyPress 2 (12×10″)
- Cricut Everyday Iron-On vinyl variety pack
- Basic weeding tool set
- Heat-resistant ruler and Teflon sheet
Mid-Range Setup (800−1,200)
- PowerPress 15×15″ clamshell heat press
- Silhouette Cameo 4 vinyl cutter
- Siser EasyWeed HTV rolls in multiple colors
- Professional weeding kit
- Infrared thermometer
- Alignment templates
Professional Setup ($2,000+)
- Hotronix Fusion IQ swing-away heat press (16×20″)
- Graphtec CE7000 vinyl cutter
- Commercial-grade HTV and sublimation paper
- Complete measuring and alignment system
- Heat press caddie with multiple platens for different garment types
Common Mistakes to Avoid
When placing logos on sweatpants and other garments, there are a few common mistakes that can undermine your design. One frequent error is choosing the wrong size for your logo—if it’s too large, it can overwhelm the garment, while a logo that’s too small may go unnoticed. Another pitfall is poor placement, such as putting the logo too close to a seam or pocket, which can distort the design or make it less visible. It’s also important to consider the fabric and material of the garment; some materials may not bond well with certain transfers, leading to peeling or fading over time. By carefully planning your placement, considering the garment’s style and construction, and selecting the right materials, you can create designs that showcase your brand and style with professionalism and flair.
① Visual Balance: How to Choose the Right Position to Maintain Overall Aesthetics
Visual balance refers to the position of the logo placed on sports pants that can coordinate with the overall design of the pants without appearing abrupt. Here are some methods to achieve visual balance:
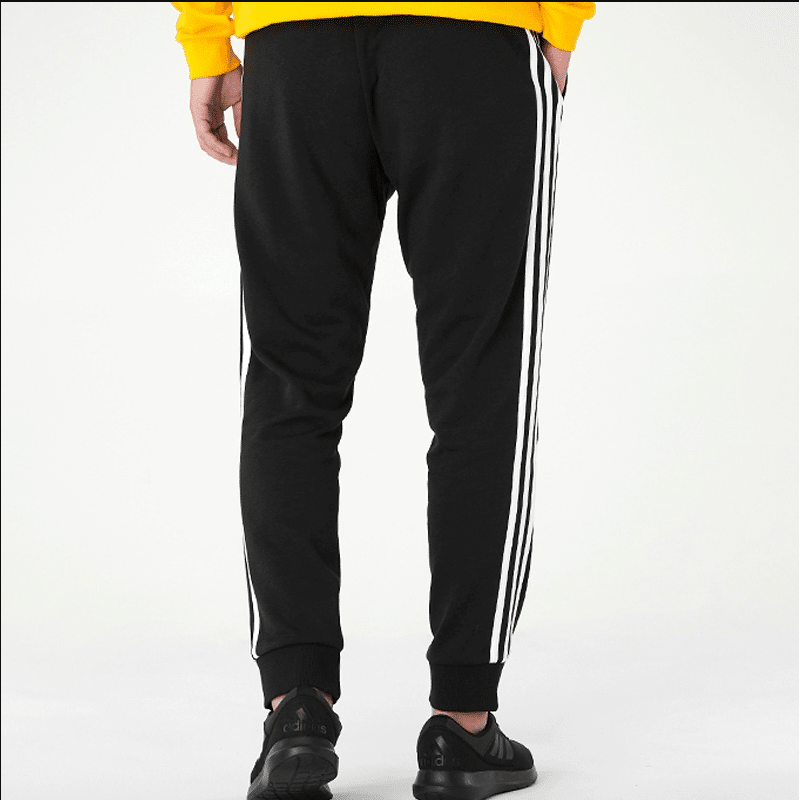
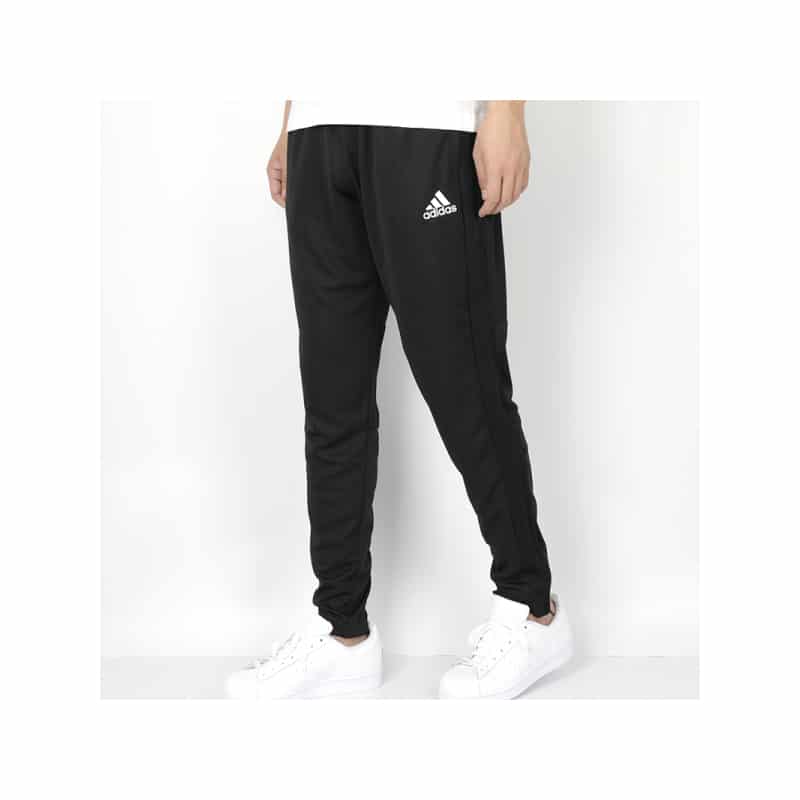
- Symmetry: The logo can be placed on both sides of the pants legs to maintain symmetry, which can make the overall design look more harmonious, such as Adidas’ sports pants. Centering the logo from right to left ensures the artwork is balanced and visually appealing.

- Proportion and Scale: The size of the logo should be proportional to the size of the pants, as logos that are too large or too small can disrupt visual balance. The center of the pant leg is often used as a reference point for logo placement.
- Color coordination: The color of the logo should be coordinated with the color of the pants, avoiding using overly bright or contrasting colors to avoid distracting attention.
② Functionality: Consider comfort during exercise and wear resistance of the logo
Functionality refers to the placement and material selection of the logo taking into account the comfort of the wearer during exercise and the durability of the logo.
- Comfort: The logo should not be placed in areas that are prone to rubbing against the skin, such as the inner thighs or waist, to avoid discomfort.
- Wear resistance: The logo should be made of wear-resistant materials and placed in areas that are not easily worn, such as avoiding the edges of the pant legs that frequently come into contact with the ground. Before applying the transfer, it’s important to pre-press the garment to remove any moisture for optimal adhesion. The transfer should also fully cover the intended print area to ensure even and successful results.
- Breathability: Breathability is an important factor during exercise, and the logo should not affect the breathability of pants, especially in areas that are prone to sweating during exercise.
- Flexibility: The position of the logo should allow the wearer to move freely without restricting their range of motion.
③ Brand Image: How to Enhance Brand Recognition through Logo Positioning
Brand image refers to the position and design of a logo that should help enhance the brand’s recognition and market influence.
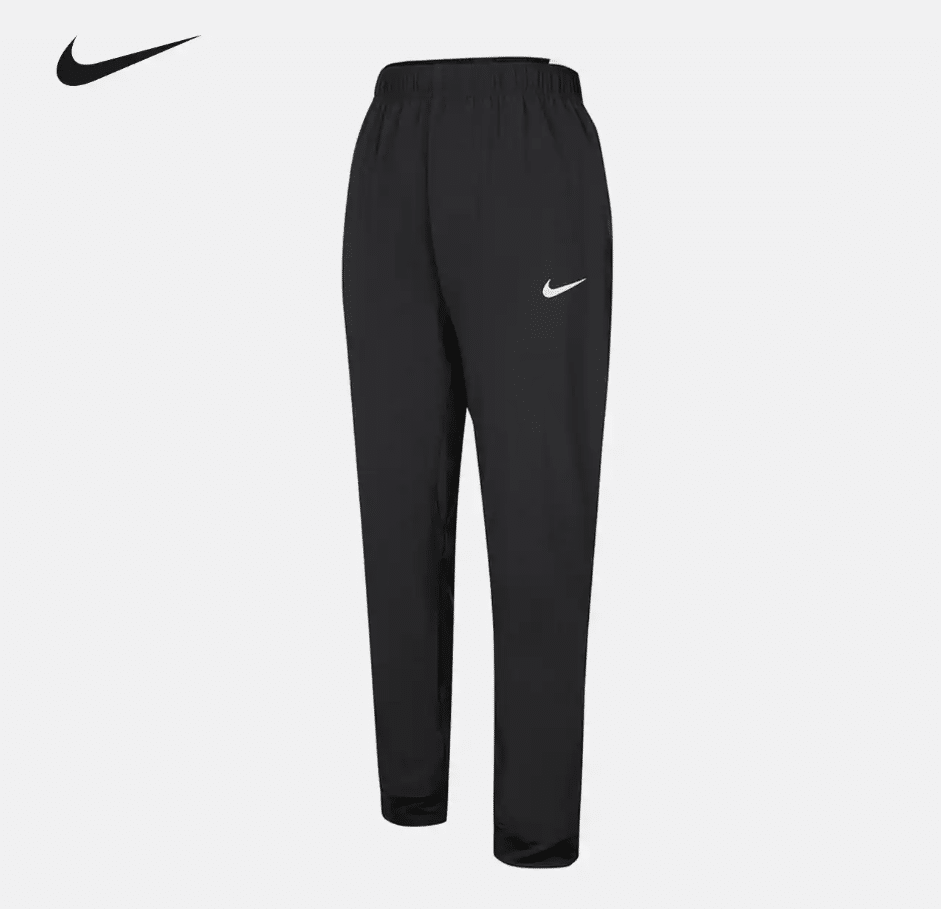
- Brand identity: The logo should clearly display the brand identity, such as Nike’s hook logo, Adidas’ three stripes, etc., which are key to brand recognition.
- Location selection: The location of the logo should be easily recognizable, such as the outer side of the pants, buttocks, and other prominent positions, to enhance the visibility of the brand. Placing the logo on one side of the pants can create a strong visual impact.
- Consistency: The position of the logo in different product lines should be consistent, which helps consumers immediately associate the brand when they see the logo.
- Innovation and Personality: While maintaining brand consistency, the brand’s personality and characteristics can also be showcased through innovative logo design and placement. Brands can get the max out of their logo placement by choosing bold or unique positions.
The placement of heat transfer printing labels for common brands of sports pants:
The pant leg offers multiple placement options for logos, including the cuff and ankle print, each with its own impact on the design’s length and visibility.
① Nike: The most common design of the logo on Nike sweatpants is on the front/side of the left leg, 5 to 7 inches down from the waistband and about 3 inches from the left stitching. Some designs feature the logo on the front thigh for a sporty look.
② Adidas: The logo on Adidas sweatpants is usually located on the side for easy recognition at a glance. The hip area is also a common placement for small or elongated logos. In addition, some designs may hide the logo on zippers, pockets, or internal labels to meet the aesthetic needs of modern consumers.
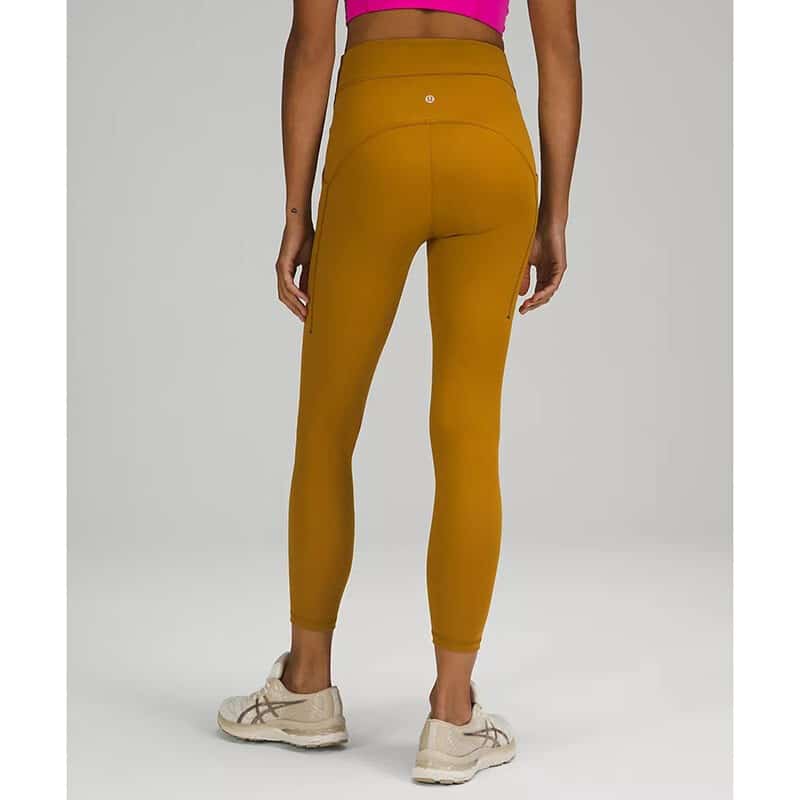
③ Lululemon: Lululemon sports pants have a relatively low-key design, and the brand logo is usually not prominent, making them suitable for commuting wear. The logo is usually placed in a more concealed location, such as the waist or internal label.
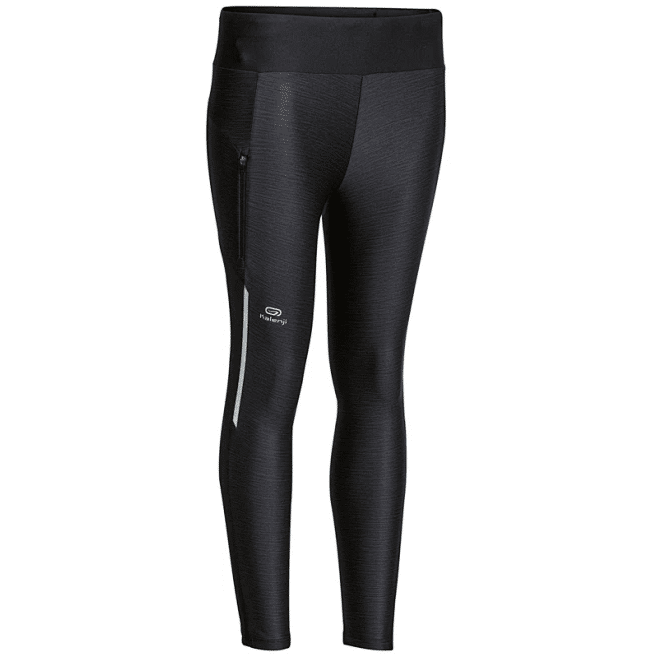
④ Decathlon: The logo on Decathlon sports pants usually appears in a prominent position on the pants, such as the side or pocket, to display the brand logo. Logos may also be placed near the knee for added visibility. Decathlon’s logo design is simple and easy to identify, usually in the form of brand name or graphic logo.
⑤ Under Armour: The Under Armour logo is composed of the first letters U and A intersecting, usually located in a prominent position on athletic pants, such as the side or back of the pant legs. The left side of the pant leg is often chosen for vertical logo placements. The design of this logo aims to showcase the power and determination of the brand.
The above information provides the general placement of heat transfer printing logos on various brands of sports pants. The specific location may vary depending on the style and design, but we can see that most brands’ logos are placed on the side of the pants legs. The length of the logo and its placement, such as above the cuff or as an ankle print, can vary depending on the brand’s style.
Heat Transfer vs Other Methods
When deciding how to place your logo on sweatpants, heat transfer is just one option. Here’s how it compares to other popular methods so you can choose the best technique for your needs.
Heat Transfer Printing
How It Works: Apply heat and pressure to bond a pre-printed or vinyl logo onto fabric.
Best For:
- Small to medium production runs (1-500 pieces)
- Full-color photographic designs
- Quick turnaround projects
- Logos on athletic and performance sweatpants
- Personalized or custom one-off items
Pros:
✓ Low setup costs—no screens or embroidery digitizing fees
✓ Excellent for complex, multi-color designs and gradients
✓ Quick application (30-60 seconds per logo)
✓ Ideal for lightweight, stretchy, or performance fabrics that move with the body
✓ No fabric texture change—maintains the original feel of sweatpants
✓ Perfect for precise placement on specific areas (left thigh, ankle, etc.)
Cons:
✗ Durability varies by transfer type (typically 25-50 washes for standard transfers)
✗ Can crack or peel if not applied correctly or if fabric stretches excessively
✗ Some transfer types don’t breathe well on performance fabrics
✗ Color may fade faster than embroidery
✗ Not suitable for rough outdoor use or heavy abrasion areas
Cost: 2−8 per logo depending on size and complexity
Embroidery
How It Works: Stitching thread directly into the fabric using computerized embroidery machines.
Best For:
- High-end, luxury sweatpants
- Corporate branding that needs to look professional
- Small logos (under 4 inches)
- Thick, sturdy sweatpant fabrics
- Long-lasting branded athletic wear
Pros:
✓ Extremely durable—lasts the lifetime of the garment
✓ Premium, professional appearance
✓ Won’t fade, crack, or peel
✓ Excellent for text-heavy logos and simple designs
✓ Adds a tactile, high-quality feel
Cons:
✗ High setup costs (50−150 for digitizing your logo)
✗ Limited color gradients—best for 6 colors or fewer
✗ Can feel stiff or bulky, especially on thin sweatpants
✗ Time-consuming (5-15 minutes per logo depending on complexity)
✗ Risk of puckering on lightweight or stretchy fabrics
✗ More expensive per unit (8−25 per logo)
✗ Difficult to place on curved areas like side seams
Cost: 15−35 per logo including setup
Screen Printing
How It Works: Pushing ink through a mesh screen stencil directly onto the fabric.
Best For:
- Large production runs (100+ pieces)
- Simple logos with solid colors
- Bold designs on the front or back waistband area
- Budget-conscious bulk orders
Pros:
✓ Most economical for large quantities (cost per unit drops significantly after 100 pieces)
✓ Vibrant, opaque colors—especially on dark fabrics
✓ Durable and long-lasting (won’t crack with proper ink curing)
✓ Fast production once screens are made
✓ Excellent color accuracy and brand matching
Cons:
✗ High setup costs (25−75 per color screen)—not economical for small runs
✗ Limited to simple designs with few colors (each color requires a separate screen)
✗ Difficult to achieve precise placement on curved surfaces or specific positions (like mid-thigh)
✗ Ink can feel heavy or stiff on fabric, affecting comfort
✗ Longer turnaround time for setup and production
✗ Not ideal for performance fabrics that require breathability
Cost: 5−12 per logo for orders of 100+; much higher for smaller quantities
Direct-to-Garment (DTG) Printing
How It Works: Inkjet technology that prints designs directly onto fabric, similar to a paper printer.
Best For:
- Complex, full-color photographic designs
- Small runs with high detail requirements
- Fashion-forward designs with unlimited colors
- Light-colored sweatpants made from cotton or cotton blends
Pros:
✓ Unlimited colors and photographic detail
✓ No setup costs—perfect for one-off or custom designs
✓ Soft hand feel—ink absorbs into fabric
✓ Eco-friendly water-based inks
✓ Quick turnaround for small orders
Cons:
✗ Works best on 100% cotton—limited compatibility with performance fabrics
✗ Colors appear faded on dark fabrics (requires white underbase)
✗ Moderate durability (30-50 washes typically)
✗ More expensive per unit than screen printing for large runs (10−20 per logo)
✗ Requires pre-treatment of fabric, adding production time
✗ Color vibrancy may diminish over time
Cost: 12−25 per logo
Comparison Table
When to Choose Heat Transfer for Sweatpants
Heat transfer is your best option when:
- You need flexible placement options: Heat transfer allows you to position logos on the left thigh, right ankle, side seam, or any unconventional spot that screen printing and embroidery can’t easily reach.
- You’re working with performance fabrics: Moisture-wicking, stretchy athletic sweatpants work best with low-temperature heat transfers that move with the fabric.
- You want full-color designs: Gradients, photographs, or logos with 7+ colors are most cost-effective with heat transfer or DTG (but heat transfer wins for placement flexibility).
- You have small to medium quantities: For runs under 500 pieces, heat transfer provides the best balance of cost, quality, and turnaround time.
- Quick turnaround is essential: Heat transfer requires minimal setup and can be completed in-house same-day.
Hybrid Approaches
Many brands combine methods for optimal results:
- Embroidered waistband logo + heat transfer thigh logo: Durable branding at the waist with bold, flexible graphics on the leg
- Screen printed large back design + heat transfer small front logo: Cost-effective for bulk with precise placement where needed
- Heat transfer base + embroidered details: Full-color heat transfer with embroidered outline for added dimension and durability
FAQ
1. Where is the best place to put a heat transfer logo on sweatpants?
The most common spot is the upper outer thigh, about 3–4 inches below the waistband and 2–3 inches from the side seam. This placement ensures visibility and a balanced look.
2. What is the recommended size for a sweatpants logo?
A typical heat transfer logo on sweatpants measures between 2″×4″ (5×10cm) and 3″×5″ (7.5×13cm), depending on the design and garment size.
3. How can I prevent my heat transfer logo from peeling off?
Use high-quality transfer paper and a calibrated heat press. Pre-wash sweatpants, avoid stretching the transfer area after application, and always follow manufacturer instructions.
4. Can I place multiple logos on one pair of sweatpants?
Yes! Multiple logos can add creative flair. Just ensure proper spacing and alignment to maintain a professional appearance.
5. What are the common mistakes with heat transfer logo placement?
Mistakes include placing logos too close to seams or waistband, uneven placement, using incorrect temperature/time, and ignoring fabric type.
6. Is heat transfer better than embroidery for logos on sweatpants?
Both have pros and cons. Heat transfer is lightweight, flexible, and great for detailed colors, while embroidery is durable and offers a 3D texture. For activewear, heat transfer is often preferred for its comfort and style versatility.
Final Checklist for Flawless Logo Placement
Before you start printing, use this final checklist to ensure your logo placement is flawless:
- Measure and size your logo to fit the garment’s proportions and print area.
- Select the ideal placement location, taking into account the garment’s style and any design elements.
- Use high-quality transfer paper and follow the recommended temperature and time settings for your material.
- Align the garment on the press, making sure to avoid seams, pockets, and other obstructions.
- Review the design for balance and visual appeal, making adjustments as needed.
- Test the transfer on a small, hidden area of the garment to confirm the results.
- Apply the transfer, using the correct peeling method (hot or cold) as recommended.
- Inspect the finished product for any imperfections, and make any necessary corrections.
By following this checklist, you’ll be able to create professional, eye-catching designs that showcase your brand and style on sweatpants and other garments, ensuring every print is a success.Get Perfect Heat Transfer Logo Placement on Sweatpants: Pro Tips & Tricks